-
Shop
- AI Skills Mastery 2026 Collection
- Beauty Guides Collection
- Best-Sellers
- Car Accessories
- Dating & Social Skills
- Digital Resources
- Beauty
- Budgeting & Saving
- Car Buying & Ownership
- Cozy Feast Collection
- Dating & Social Confidence
- Electronics & Technology
- Emotional Intelligence
- Entrepreneurship & Business Growth
- Financial Independence
- Financial Mindset & Psychology
- Goal Setting
- Halloween Digital Collection
- Hobbies
- Home Styling & Organization
- Kitchen & Cooking
- Leadership
- Mindfulness
- Motivation
- Nutrition & Healthy Eating
- Parenting & Child Development
- Personal Style & Fashion
- Positive Thinking
- Productivity
- Self Confidence
- Sleep Improvement
- Smart Amazon Shopping
- Smart Black Friday Shopping
- Smart Life with AI
- Stress Management & Relaxation
- Thanksgiving Digital Collection
- Travel & Adventure
- Travel Planning
- Wellness & Self-Care
- Yoga & Mind-Body Practices
- Easter
- Education & Learning
- Family & Parenting
- Fashion
- Fashion Accessories
- Financial Education
- Fitness & Yoga Guides
- Gadgets
- Gift Guide Collection
- Gifts
- Health & Beauty
- Health & Wellness
- Home & Garden
- Home Supplies
- Kids & Babies
- Kitchen
- Mindset
- Online Business for Beginners
- Parenting Guides Collection
- Personal Growth
- Pet Care
- Pet Lifestyle & Wellness
- Pets
- Smart Home Living Guides
- Sport & Outdoors
- Stress Relief & Relaxation
- Super Deals
- TikTok Growth & Monetization Mastery
- Travel
- Valentine’s Day Inspiration
- Wealth
- Wealth Building
- Winter Fashion
- Women’s Wellness & Lifestyle
- YouTube Shorts Best-Sellers
- Popular
- Best deals
Home Staging Checklist: Room-by-Room Prep for Showings
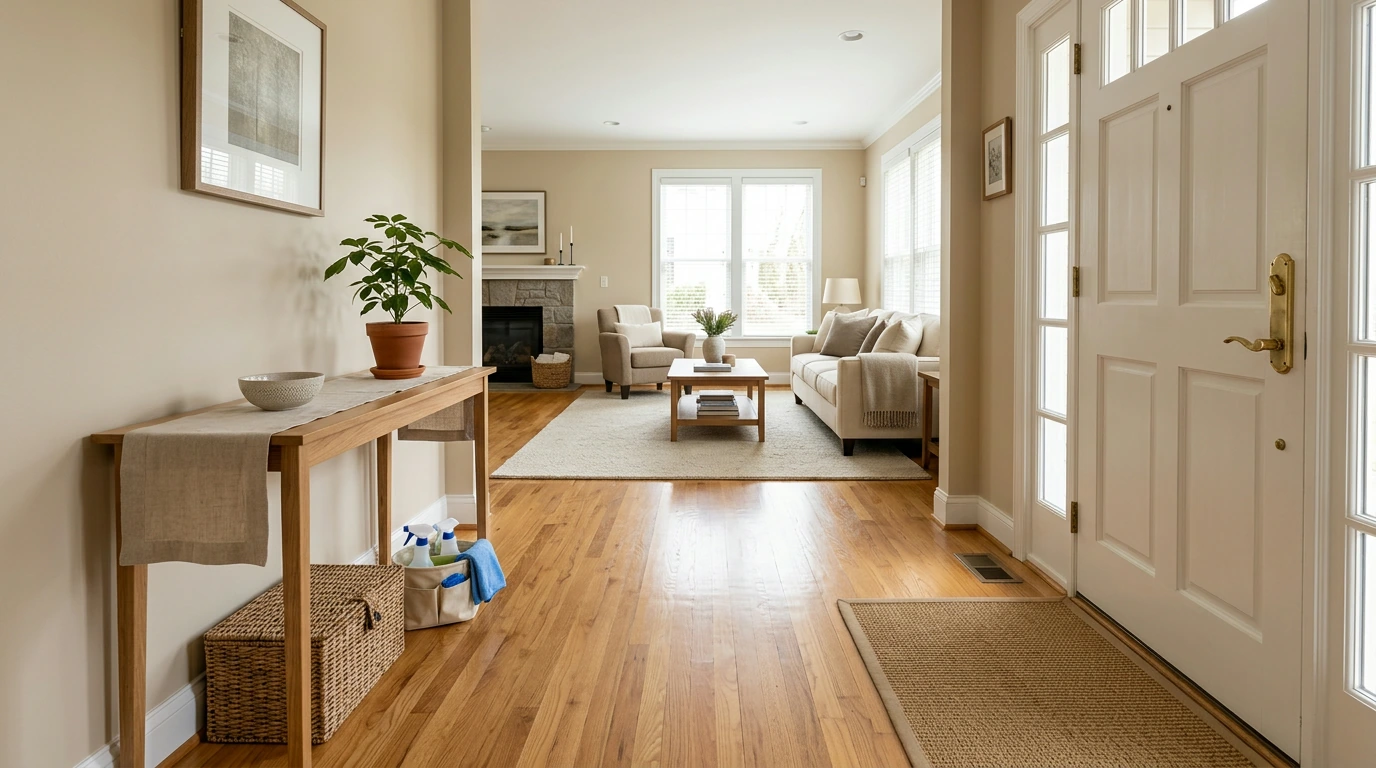
Before the Checklist: Set the Goal and the Timeline
A smooth staging sprint starts with two dates: a target “photo day” and a “first showing” day. Once those are on the calendar, work backward in two or three focused phases—repairs and deep cleaning first, then decluttering and organization, and finally styling and lighting. That sequence keeps you from re-cleaning the same surfaces after you’ve packed or painted.
Decide early what stays and what goes. Daily-life items (extra countertop gadgets, mail piles, kid gear, pet accessories) should be packed or contained sooner than later, while décor should stay minimal and intentional. Gather a single “staging tote” so you’re not hunting for basics: microfiber cloths, glass cleaner, a magic eraser, spackle, painter’s tape, light bulbs, trash bags, donation boxes, and neutral linens.
One practical habit that saves you during showings: create a drop zone (a lidded basket or small bin) for keys, chargers, pet leashes, and mail so flat surfaces stay clear.
| When | Focus | Typical Tasks |
|---|---|---|
| 7–14 days before photos | Repairs + deep clean | Patch holes, touch-up paint, fix squeaks, service HVAC, deep clean kitchen/baths, wash windows |
| 3–7 days before photos | Declutter + organize | Pack personal photos, clear counters, thin closets, donate extras, organize pantry/linen |
| 24–48 hours before photos | Style + lighting | Add fresh towels/linens, set simple table, place neutral art/pillows, replace bulbs, open blinds |
| Showing day | Reset + scent control | Quick wipe-down, hide bins/laundry, make beds, empty trash, ventilate, secure valuables |
Curb Appeal: First Impressions in 60 Seconds
Before a buyer steps inside, they’re already forming an opinion. Keep the exterior “quiet” and cared for: sweep the porch, clear cobwebs, and make sure the front door looks freshly cleaned. A new doormat and one simple potted plant read as welcoming without feeling staged.
Do a quick yard pass: mow and edge, remove weeds, trim shrubs away from windows, and clear walkways. Straighten house numbers so they’re easy to read and check that the porch light works. If trash bins are visible, relocate them out of sight for photos and showings.
Finally, aim for a “parking ready” driveway. Store bikes, sports gear, and toys so the front looks spacious and simple.
Entryway and Hallways: Clear the Path
Hallways and entries sell flow. Remove extra furniture so walkways feel wider; a slim console or small bench is usually enough. Add one focal point—a mirror or art—then keep everything else restrained (a small tray or bowl for polish, not for everyday clutter).
Fix what stands out here because it’s at eye level: scuffed baseboards, sticky doors, squeaky hinges, and burned-out bulbs. Keep floors spotless; use a low-pile runner only if it improves safety and makes the area feel more finished.
Living Room and Common Areas: Make the Space Feel Larger
Arrange furniture to highlight the room’s purpose. Create a clear conversation zone, a reading corner, or a defined media wall—then remove anything that muddies the story. If the room feels tight, try pulling furniture a few inches away from walls and reducing oversized pieces.
Reduce visual noise by limiting throw pillows, blankets, and knickknacks. Keep surfaces mostly clear so buyers notice the space, not the stuff. Maximize light: open blinds, clean windows, and use consistently warm bulbs across lamps and fixtures. The U.S. Department of Energy has a helpful overview of efficient lighting choices and bulb basics at energy.gov.
Kitchen: Clean, Clear, and Functional
Buyers open everything, so thin and organize cabinets and the pantry until there’s “room to spare.” Deep clean the high-impact spots: sink and faucet, stovetop, oven door, backsplash, cabinet fronts, and the fridge exterior. For odor control, empty trash daily and avoid strong air fresheners—fresh air wins. For practical guidance on ventilation and indoor pollutants, see the EPA’s indoor air quality resources at epa.gov.
Kitchen Reset Checklist (15-Minute Showing Prep)
| Task | What to Look For | Finish Line |
|---|---|---|
| Clear counters | Appliances, mail, bottles, pet items | Only 1–2 simple accents remain |
| Shine sink + faucet | Water spots, soap residue | Dry, polished, no dishes |
| Wipe surfaces | Crumbs, fingerprints, splatters | Uniform clean across counters/backsplash |
| Trash + recycling | Overflow, odor | Emptied and hidden |
| Floor check | Crumbs, sticky spots | Quick sweep and spot mop |
Dining Area: Show Seating and Space
Bathrooms: Spa-Clean, Not Personal
Bedrooms: Calm, Minimal, and Bright
Laundry, Utility Rooms, and Storage Areas: Prove Capacity
Final Pass Before Photos and Showings
For peace of mind, store valuables, prescriptions, sensitive paperwork, and small electronics. If you want market context on what buyers pay attention to, the National Association of Realtors publishes ongoing research at nar.realtor.
Printable Checklist: What to Include on Paper
Keep a “showing reset” page that takes 10–20 minutes, and leave space for agent feedback and quick adjustments after showings. For a ready-to-print option, use Download the Home Staging Checklist for Sellers (printable digital file).
Helpful Digital Guides to Stay Organized
- Home Staging Checklist for Sellers | Real Estate Staging Guide | Printable House Selling Prep List | Digital Download for Faster Home Sales (a room-by-room plan plus a quick showing-day reset)
- Enchant Your Space with Witchy Home Styling | Digital Guide for Magical Home Decor & Inspiration (for cohesive, intentional styling ideas that still keep clutter in check)
FAQ
Is there a PDF checklist for preparing my home for sale?
Yes—there’s a printable digital-download checklist that can be printed or used on a tablet or phone. It’s organized room-by-room and typically includes a quick “showing-day reset” page to make last-minute touch-ups fast.
What not to do when staging a house?
Avoid over-decorating, using strong scents, leaving personal photos or valuables out, and ignoring lighting. Don’t try to hide problems instead of repairing them, and don’t overcrowd rooms (or forget closets, storage areas, and the garage).
Recommended for you



Best Real Leather Belt Makers: What to Look For
Sep 5, 2026













Leave a comment